If you struggle to keep track of files in Google Drive, organizing with folders could be the solution. Over time, Google Drive can get cluttered with documents, photos, and projects, making it challenging to find what you need. As someone who has gone through the process, I’ve found that sorting files into folders brings instant order and ease. Here’s a step-by-step guide to organize your Google Drive effectively.
Ready to clean up your Google Drive? Let’s dive in!
Tip #1 - Create Folders for Key Categories
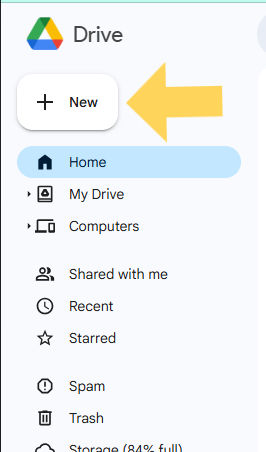
Creating folders in Google Drive is straightforward. By categorizing files into folders like “Work,” “Personal,” or “Projects,” you can keep similar files together and find them faster. Click on “+ New,” select “Folder,” and name it to start sorting.

Pro Tip: Use specific, clear folder names to make future searches easier.
Tip #2 - Use Subfolders for Detailed Organization
If you have multiple projects or documents within a category, consider adding subfolders. For example, under “Projects,” create folders for each individual project. This way, everything is neatly organized without needing to sift through a massive list of files.
Tip #3 - Color-Code Your Folders
Color-coding is a powerful way to make folders stand out visually, adding clarity to your Google Drive layout. Simply right-click on a folder, select “Change color,” and choose your preferred shade.

Tip #4 - Archive Old Files to a Separate Folder
Avoid clutter by moving older files to an “Archive” folder. This keeps your main folders focused on current files, making them quicker to navigate without deleting past projects you might need later.
Quote: “A well-organized Drive boosts productivity and reduces the frustration of searching through unorganized files.” – Digital Productivity Expert
Tip #5 - Add Shared Folders for Collaborative Projects
Shared folders can be a game-changer for team projects. Create a folder, add files, and share it with others. This lets everyone access essential files in one place, reducing endless email chains and ensuring collaboration stays organized.
Tip #6 - Regularly Review and Clean Up
Make it a habit to review your Drive and move any outdated or unused files to the trash. Set aside time once a month for a quick cleanup, so your Drive remains organized and easy to navigate.
Taking these steps to organize your Google Drive with folders will streamline your workflow and reduce clutter. Ready to give it a try? Start by creating your first folder today!
1. How to Organize Google Drive on Phone:
Step 1: Open the Google Drive app.
Step 2: Use the Folders tab to create folders for categories, such as “Work” or “Personal.”
Step 3: Move files into folders by selecting each file, tapping the More Options (three dots), and selecting Move.
Step 4: Rename or color-code folders by tapping on each folder’s options to make locating them easier.
2. How to Organize Google Drive on Android:
Step 1: Open the Drive app on your Android.
Step 2: Tap the + button to create folders for different categories.
Step 3: Move items to folders by holding down on a file, selecting Move, and then choosing a target folder.
Step 4: Use the search bar to find files quickly or add star labels to your most-used files.
3. How to Organize Google Drive Folders:
Step 1: Create folders for broader categories.
Step 2: Inside each folder, make subfolders to break down content further (e.g., “Work Reports” inside “Work”).
Step 3: Use colors to differentiate folders (right-click > Change color).
Step 4: Archive or delete unnecessary files to keep things uncluttered.
4. How to Organize Google Drive for Company:
Step 1: Create shared drives for different departments or teams.
Step 2: Use a structured naming system for folders, like “Project_Name_Date.”
Step 3: Set access permissions based on role, allowing only relevant team members access.
Step 4: Regularly review and archive outdated documents.
5. How to Make a Folder in Google Drive on Mobile:
Step 1: Open the Google Drive app and tap the + icon.
Step 2: Select Folder and name it as needed.
Step 3: Tap Create to save the folder in your Drive.
Step 4: Move files into the folder by selecting them, tapping the More Options menu, and choosing Move.
6. How to Create a Folder in Google Drive and Share It:
Step 1: Open Google Drive, click New > Folder, and name the folder.
Step 2: Right-click the folder and select Share.
Step 3: Enter email addresses of people to share with and set permissions (View, Edit, Comment).
Step 4: Click Send to notify users and share the folder.
7. Automatically Organize Google Drive:
Step 1: Use Google Drive automation tools or third-party integrations like Zapier to automatically organize incoming files.
Step 2: Set rules in the automation tool to move files into specific folders based on type, date, or keyword.
Step 3: Regularly review the automation to ensure it’s sorting correctly.
8. How to Organize Google Drive Folders Alphabetically:
Step 1: Go to Google Drive’s My Drive view.
Step 2: Click the Sort dropdown at the top-right corner.
Step 3: Select Name to arrange folders alphabetically.
Step 4: Alternatively, manually rename folders with alphabetical labels (e.g., “A - Work” and “B - Personal”) to control order manually.

Comments