
A Guide to Gmail Display Density
- Sharon Rajendra Manmothe
- Mar 28, 2024
- 8 min read
Updated: Nov 16, 2024
Density in Gmail refers to the amount of space between elements in your inbox view. This setting allows you to control how much information you see on each screen.
In Gmail, density plays a crucial role in determining the spacing between various elements within your inbox interface. By adjusting the density settings, users can personalize the amount of information displayed on each screen according to their preferences. A lower density setting increases the spacing between elements, making it easier to navigate and locate specific emails, while a higher density setting reduces the spacing, allowing more content to be visible on the screen at once. This feature enables users to optimize their Gmail experience based on their workflow, whether they prefer a more spacious layout for better readability or a compact view to access more information at a glance. By fine-tuning the density settings, Gmail users can customize their inbox to suit their individual needs and enhance their overall productivity when managing emails.
Access Density Options:
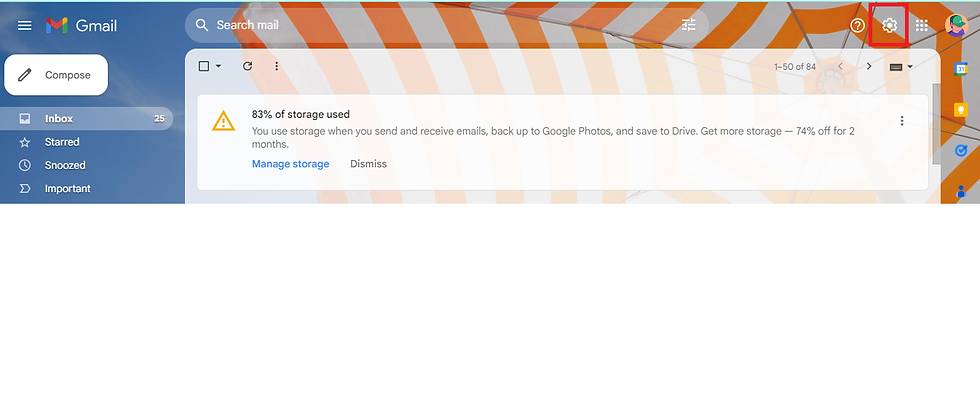
Click the Settings icon (gear symbol) in the top right corner.
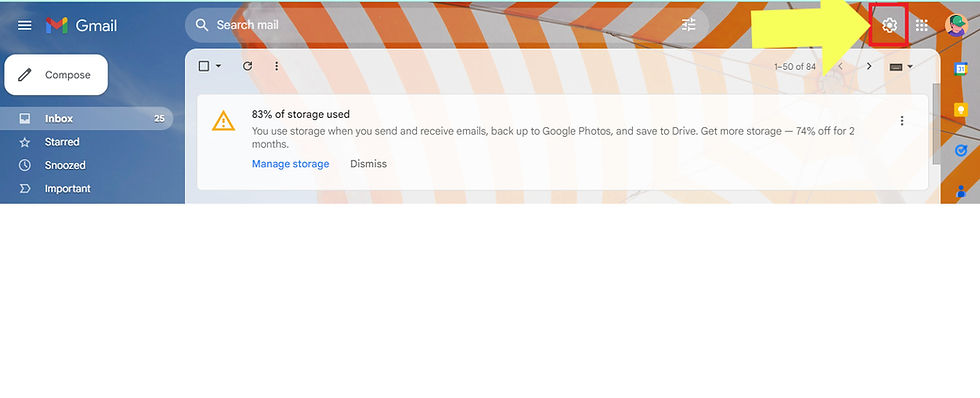
Gmail Display Density Select "See all settings" for a full list of customization options.
Choose Density Preference:
Options include:
Comfortable: Balanced spacing for readability.
Cozy: Moderate space between items.
Compact: Most condensed view, ideal for viewing many emails at once.

Gmail Display Density
Adjust Display to Workflow:
Set to "Comfortable" for a more open view or "Compact" to see more emails on one screen.
Save Changes:
Ensure all adjustments are saved by clicking the Save Changes button at the bottom of the page.
Enhance Productivity:
Customize density based on screen size and reading habits for optimal email management
When it comes to density options, there are usually three main choices that individuals can consider based on their specific needs and preferences. The first option is low density, which is characterized by a softer feel and a more plush appearance. This type of density is often preferred by those who enjoy a more sink-in, cozy sensation when sitting or lying down. On the other end of the spectrum, we have high density, which offers a firmer and more supportive feel. High-density options are ideal for individuals who prioritize proper spinal alignment and firm support. Lastly, there is medium density, which strikes a balance between the softness of low density and the firmness of high density. This option is versatile and can cater to a wide range of preferences, making it a popular choice among many consumers. Ultimately, the right density option for you will depend on factors such as your comfort preferences, sleeping habits, and any specific health considerations you may have.
Comfortable (default): Provides a balance between spacing and information, adjusting automatically based on your screen size.
Cozy: Offers a middle ground, with slightly less space than comfortable.
Compact: Shows the most emails possible by minimizing space between elements.
Adjusting the density in Gmail can significantly impact your email management experience. By customizing the density settings, you can choose how compact or spacious you want your inbox to appear. This feature allows you to optimize the layout of your Gmail interface based on your preferences and workflow. If you prefer a more condensed view, you can select the "Compact" option to fit more messages on the screen at once, making it easier to scan through your emails quickly. On the other hand, if you prefer a more airy and spacious layout, you can opt for the "Comfortable" setting, giving each email more breathing room and visual separation.
Customizing the density in Gmail is particularly useful for users who receive a high volume of emails daily or for those who want to tailor their inbox layout to suit their browsing habits. By adjusting the density settings, you can find a balance between information density and visual comfort, ensuring that your Gmail inbox is organized in a way that enhances your productivity and overall email management efficiency.
To access your Gmail account from your computer, you need to open the Gmail website using a web browser. This action allows you to check your emails, compose new messages, organize your inbox, and manage your contacts and settings. By navigating to the Gmail website and logging in with your credentials, you can stay connected with your contacts, receive important updates, and communicate effectively. Opening Gmail on your computer provides you with a user-friendly interface that enables you to utilize various features such as labels, filters, and search functions to enhance your email management experience.
Click on the Settings icon (gear symbol) in the top right corner.
To access a comprehensive list of settings, navigate to the dropdown menu and opt for the "See all settings" option. This action will unveil a plethora of configuration options that allow you to customize various aspects of the system or application. By selecting this feature, you gain access to a wide array of controls and preferences, enabling you to fine-tune your experience according to your specific needs and preferences. This inclusive settings menu serves as a hub for managing everything from basic preferences to advanced configurations, empowering you to tailor the environment to suit your requirements effectively.
It is important to ensure that after making any modifications or updates, you click on the "Save Changes" button located at the bottom of the page. By clicking this button, you confirm that the changes you have made are final and will be saved. This action is crucial as it helps to preserve the updated information and apply it to the relevant sections of the page. By clicking "Save Changes," you are essentially committing to the alterations you have made, ensuring that they are properly recorded and implemented. Remember, failing to click this button may result in your changes not being saved, leading to potential loss of work or outdated information. Therefore, always remember to click "Save Changes" to secure your updates and ensure that your edits are successfully applied.
Customizing the density settings in your Gmail inbox allows you to tailor the display of information to perfectly match your preferences and needs. By adjusting the density, you have the flexibility to choose how much information you want to see at a glance, making it easier to manage your emails efficiently. Whether you prefer a more spacious layout with larger previews or a compact view that shows more messages on the screen, Gmail's density options empower you to create a workspace that enhances your productivity.
With the ability to fine-tune the density settings, you can optimize your Gmail experience based on your specific workflow and the size of your screen. This level of customization ensures that you can focus on what matters most to you, whether it's quickly scanning through emails, organizing your inbox with precision, or maximizing the use of your display space. The versatility provided by adjusting the density not only streamlines your email management but also enhances your overall user experience by putting you in control of how information is presented to you.
Some FAQs about Gmail Display Density
How to Change Display Density in Gmail?
Gmail allows users to adjust the display density, which changes the spacing between emails and interface elements for better visibility and comfort. Follow these steps to change the display density:
Log into Gmail:
Open your browser and go to Gmail.
Enter your email credentials to log in.
Open the Quick Settings Panel:
Click the gear icon (⚙️) in the top-right corner of your Gmail interface.
Choose Display Density:
A panel titled "Quick Settings" will appear.
Under the "Density" section, you’ll see three options:
Default: Displays icons for attachments (e.g., PDFs, images) and slightly larger spacing.
Comfortable: Removes the attachment icons, keeping a cleaner appearance.
Compact: Reduces spacing for maximum email visibility on one screen.
Select Your Preferred Density:
Click on one of the options (Default, Comfortable, or Compact) to see a live preview.
The changes will be applied immediately without needing to save.
Close Settings:
Simply click anywhere outside the panel to close it.
How to Create a Template in Gmail (2024)?
Templates in Gmail save time by allowing you to reuse email content. Gmail’s built-in template feature is perfect for frequently sent messages.
Steps to Create a Template:
Enable Templates Feature:
Click the gear icon (⚙️) in the top-right corner.
Select "See all settings" from the dropdown.
Navigate to the "Advanced" tab in the settings menu.
Find the "Templates" section and click "Enable."
Scroll down and click "Save Changes."
Compose Your Template:
Click the "+" (Compose) button to start a new email.
Draft the email message you want to save as a template (including subject line, body, and any formatting).
Save the Template:
Click on the three-dot menu (⋮) at the bottom-right corner of the compose window.
Hover over "Templates" and select "Save draft as template."
Choose "Save as new template."
Provide a name for your template (this name will be used to identify it later).
Use the Template:
Whenever you need to use the template, open a new email.
Click the three-dot menu (⋮), go to Templates, and select your saved template.
Edit or Delete Templates:
To modify an existing template, overwrite it by saving a new draft as a template with the same name.
To delete a template, go to Templates, hover over the template name, and click the delete option.
How Do I Customize My Gmail Display?
Customizing your Gmail display enhances usability and personalizes your email experience.
Options to Customize Gmail Display:
Change the Theme:
Click the gear icon (⚙️) and go to Quick Settings.
Under the "Theme" section, click "View all" to explore available themes.
Choose a theme and click "Save" to apply it.
Adjust Inbox Type:
In Quick Settings, under "Inbox type", choose from options like:
Default: Sorts emails into Primary, Social, Promotions, etc.
Important first: Displays important emails at the top.
Unread first: Shows unread emails at the top.
Starred first: Highlights starred emails.
Priority Inbox: Customizes the inbox layout based on importance.
Select an option, and Gmail will instantly rearrange your inbox.
Show/Hide Sidebar:
Click the hamburger menu (three horizontal lines) in the top-left corner to collapse or expand the sidebar.
You can also customize what appears in the sidebar by navigating to Settings > Labels and toggling visibility for labels like Spam, Trash, or custom folders.
Add Widgets:
Enable Chat or Google Meet in the left panel through Settings > Chat and Meet.
Integrate add-ons like Google Calendar or third-party tools via the Google Workspace Marketplace (accessible from the sidebar).
Enable/Disable Conversation View:
Go to Settings > General and scroll to Conversation View.
Choose whether to group related emails together or show them as separate entries.
How Do I Improve My Gmail Layout?
Improving Gmail’s layout involves strategic organization to enhance efficiency and readability.
Ways to Optimize Gmail Layout:
Use Labels and Categories:
Create labels for categorizing emails.
Go to Settings > Labels and click "Create new label."
Apply labels to emails by selecting them and clicking the label icon.
Turn On Smart Features:
Enable Gmail's smart features like Smart Compose and Smart Reply for quick suggestions.
Navigate to Settings > General > Smart Compose and activate it.
Enable Nudges:
Gmail can remind you to follow up on unanswered emails or reply to forgotten ones.
Go to Settings > General > Nudges and check the relevant boxes.
Star and Prioritize Emails:
Use stars and importance markers to highlight critical emails.
Customize star types under Settings > General > Stars.
Utilize Filters and Rules:
Automate email sorting using filters.
Go to Settings > Filters and Blocked Addresses, and create a filter by specifying conditions like sender, keywords, or attachments.
Compact View for Busy Accounts:
If you receive many emails daily, switch to Compact Density under Quick Settings to maximize on-screen visibility.
Comments